As being a frequent user of computer systems, you must be familiar to the name of windows operating system and its functionalities. You can create and store a large amount of information in it so the security must be the first preference. If you have a PC or laptop in which important data is stored then it is an advice that creates Restricted Guest Accounts in Windows 10. This kind of accounts can be harnessed by putting some limitations so that no one can access the valuable information either than you.
The guest accounts are commonly created for the use of third person who want to access your computer system for any general use. A time may come when you will have to share your computer with others temporarily. In this situation, giving the privilege of guest account instead on administrative account is a wise decision. There are several methods to create Restricted Guest Accounts in Windows 10 operating system. The implementation of these methods is not a tough task, all you need is to follow the instructions as given below in this article:-
![How to Create Restricted Guest Accounts in Windows 10 [Easy Ways]](https://codeablemagazine.com//wp-content/uploads/2017/05/Guest-Accounts-in-Windows-10.jpg)
How to Create Restricted Guest Accounts in Windows 10 [Easy Ways]:
-
Through user account settings
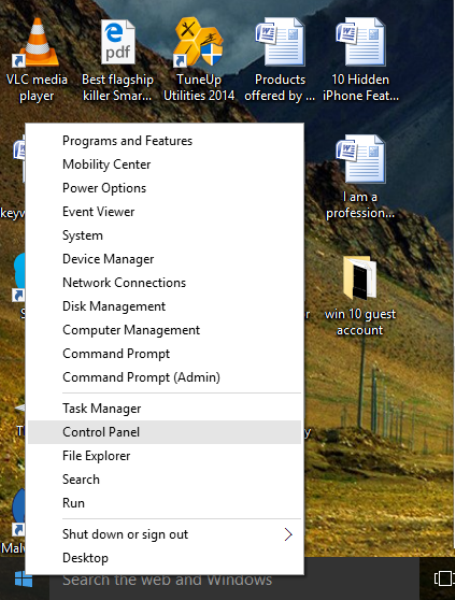
1) Right click on the windows 10 start button which is present in the right lower corner of screen and select “control panel” option from list.
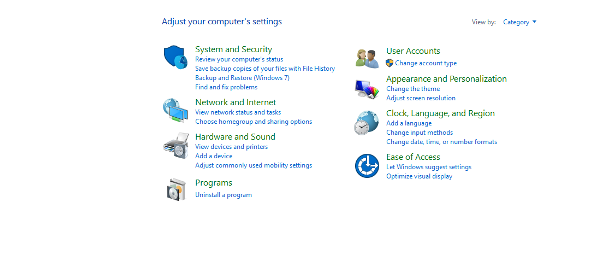
2) In the control panel, click on change account type option under user account.
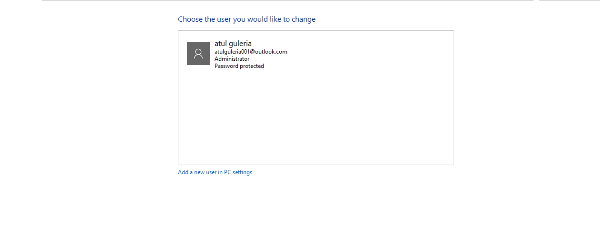
3) In the next windows, click on “add a new user in PC settings” and you will be directed to the settings of windows.
4) The lower section of this settings interface will show “add someone else to this computer” just click on it.
5) Enter a valid Microsoft mail ID or phone number for the account and click next to create it.
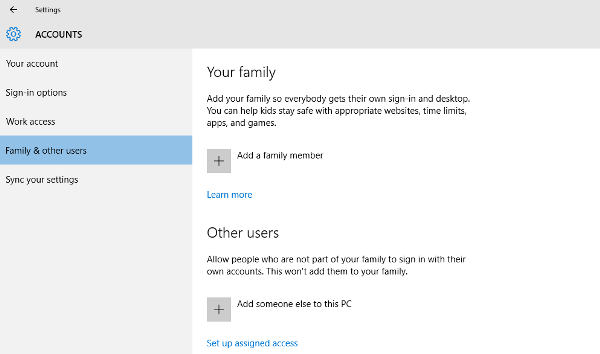
6) After setting up a new account, come back and click on “setup assigned access”.
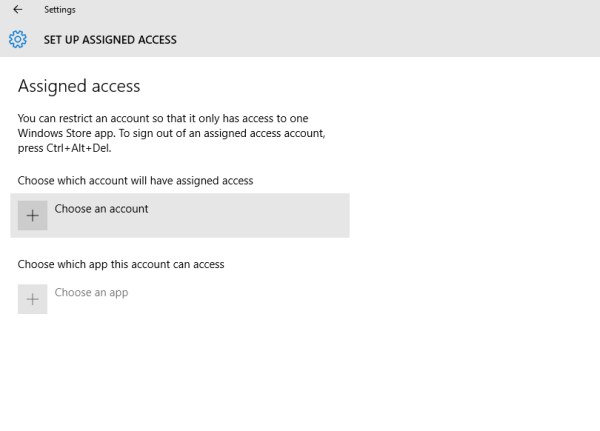
7) Now select the account that you have recently created and assign the applications that you want to set free for that account.
Using command prompt
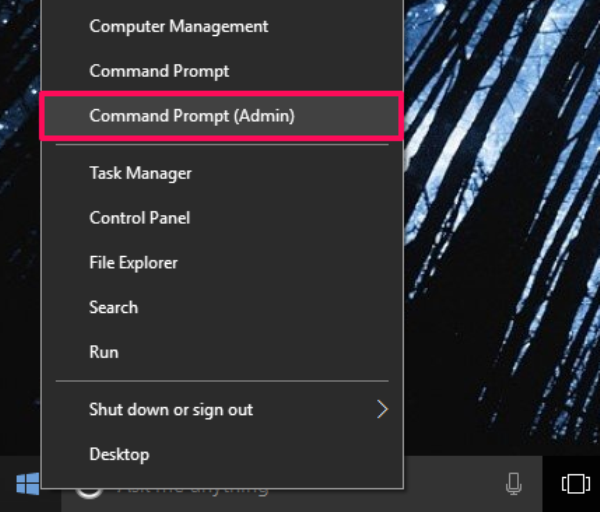
- First of all you need to open the command prompt by right clicking on windows 10 start button and selecting “command prompt (admin)” option.
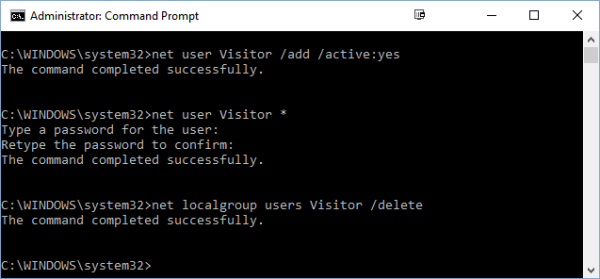
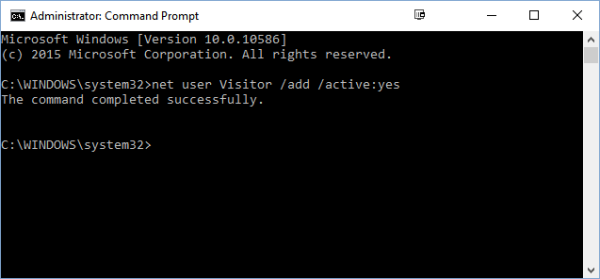
- Here you have to enter the following command line and press enter:-
net user Visitor /add /active:yes

- Again press enter when it will ask to set the password. By pressing enter key twice, the password assigning process will skip.
- Now type this command and hit enter again:-
net localgroup users Visitor /delete

This command will remove the guest user account from administrative users group
- Now type this command line:-
net localgroup guests Visitor /add
- By hitting enter, visitor users will add to the guest group from where no one can access the important files of computer system. This is the whole process to Create Restricted Guest Accounts in Windows 10.